After 30 years as a Red Seal garage door technician across British Columbia, I can tell you that a door that refuses to close is the most common—and most frustrating—service call I get. Nine times out of ten, the culprit is something simple: a dirty sensor lens, a misaligned photo eye, or a forgotten obstruction. But sometimes it’s a broken spring or a travel limit that’s drifted out of whack. In this guide, I’ll walk you through every possible cause, from the most likely to the sneaky ones, and give you clear, safe steps to diagnose and fix the problem yourself. I’ll also tell you exactly when to put down the tools and call a pro—because some repairs are dangerous or require specialized equipment.
Whether you live in damp coastal Vancouver or the dry cold of the Interior, the same principles apply. I’ll use real Canadian prices, real BC climate context, and no marketing fluff. Let’s get your door closing again.
boltKey Takeaways
- Most no-close issues are caused by dirty or misaligned safety sensors—clean and realign them first.
- Always test the safety reverse with a 2x4 after any adjustment to ensure it meets UL 325 standards.
- Travel limit settings can drift; adjust in small increments if the door reverses near the floor.
- Broken springs are dangerous—never attempt DIY replacement; call a pro.
- Remote and wall button issues are common; replace batteries and check power before assuming the door is broken.
- If the door still won't close after basic troubleshooting, call a licensed technician to avoid injury or further damage.
1. Clear the Opening and Check the Door Path
The first thing I do on every no-close call is walk up to the door and look. It sounds obvious, but homeowners often overlook a broom handle, a child’s toy, or a chunk of ice that’s fallen off the roof. Anything that breaks the plane of the door can trigger the safety reverse. In BC’s coastal winter, ice buildup on the bottom seal is a frequent offender. In the Interior, it’s often packed snow or frozen debris.
Step 1: Visual inspection – Clear the entire area under and around the door. Look for items on the floor, in the tracks, or leaning against the door. Check the weatherstripping for ice or rocks. Step 2: Track check – Inspect the vertical and horizontal tracks for dents, bends, or obstructions. A bent track can cause the rollers to bind, making the opener think there’s an obstruction. Step 3: Rollers and hinges – Look for worn or broken rollers. If a roller is seized, the door may struggle to move and reverse. In 30 years, I’ve seen a single stuck roller cause a door to reverse every time.
If you find an obstruction, remove it and test the door. If the tracks are damaged, that’s a call for professional garage door repair in Vancouver or your local area—track repair requires special tools and expertise.
2. Check the Photo Eyes (Safety Sensors)
Modern garage door openers have two sensors mounted near the floor on each side of the door. They create an invisible beam; if anything breaks that beam, the door won’t close. This is the #1 reason doors won’t close. In my experience, 70% of no-close calls are solved by cleaning or realigning these sensors.
What to look for
- Indicator lights: Both sensors should have a steady green or amber LED. If one is off, dim, or flickering, the beam is broken or misaligned. The receiving sensor (usually the one with the larger lens) will have a light that goes out when the beam is blocked.
- Dirty lenses: Dust, cobwebs, or road grime can block the beam. Wipe both lenses with a soft, dry cloth. If they’re greasy, use a little glass cleaner.
- Mounting: Sensors must be at the same height and pointed directly at each other. Even a 1/4-inch shift can break the beam.
How to realign
- Unplug the opener or turn off the breaker.
- Loosen the wing nuts or screws on both sensor brackets just enough to move them.
- Use a level to ensure both sensors are at the same height. I often use a string line stretched across the opening as a reference.
- Adjust each sensor until the indicator lights are steady. You may need a helper to watch the light while you move the sensor.
- Tighten the screws, restore power, and test the door.
If the sensors still won’t align, the wiring may be damaged or the sensors themselves may be faulty. This is a good time to call for garage door opener repair—a technician can test voltage and replace sensors if needed.
3. Test the Safety Reversal System
After any sensor adjustment, you must test the safety reverse. This is not optional. UL 325 requires that residential openers reverse on contact with a 1.5-inch-high object. I use a 2x4 laid flat (which is about 1.5 inches thick). Place it centered under the door and press the close button. The door should stop and reverse within 2 seconds of hitting the board. If it doesn’t, the opener needs adjustment or repair before you use it again—this is a safety hazard for children and pets.
If the door reverses but the sensors are clean and aligned, the issue may be the travel limits. Move on to the next section. Never disable the safety sensors; it’s illegal and dangerous. A professional garage door repair Surrey technician can adjust the force settings if needed.
4. Adjust Travel Limit Settings
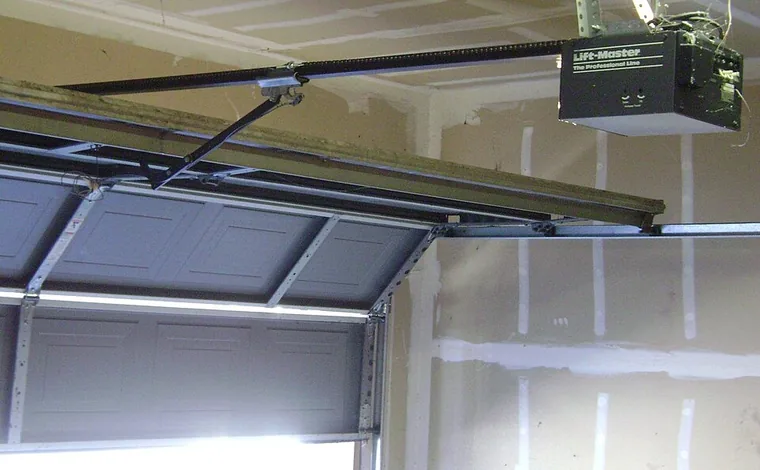
If the door starts to close but reverses about 6–12 inches from the floor, the down travel limit is likely set incorrectly. The opener thinks it has reached the floor when it hasn’t, so it reverses. This is common after a power surge or if someone has bumped the adjustment screws.
On most openers, there are two plastic screws or buttons on the motor unit: one for up travel, one for down travel. Some newer models use digital buttons. Locate the down limit adjustment. Turn it clockwise (or press the button) in small increments—about 1/4 turn at a time. Then test the door. Repeat until the door closes fully but doesn’t slam into the floor. Then retest the safety reverse with the 2x4.
Be careful not to set the down limit too far; this can cause the door to hit the floor with excessive force, damaging the seal or the door itself. If the door still reverses after several adjustments, the force setting may need tweaking, or there may be an underlying mechanical issue. In that case, call a pro. I’ve seen homeowners chase travel limits for hours only to find a broken spring or a seized roller.
5. Inspect for a Broken Spring
A broken torsion or extension spring is a serious issue. The spring counterbalances the door’s weight. When it breaks, the opener has to lift the full weight—which it can’t do safely. The door may not close at all, or it may close unevenly and reverse. Signs of a broken spring: the door is heavy to lift manually, it won’t stay open partway, you hear a loud bang, or you see a gap in the spring coils.
In BC, where coastal humidity can cause rust, springs typically last 7–10 years. In the dry Interior, they may last longer. A replacement torsion spring costs around $200–$400 installed, depending on door size and spring type. Never attempt to adjust or replace springs yourself. They are under extreme tension (hundreds of pounds of force) and can cause severe injury or death. Always call a licensed technician.
If you suspect a broken spring, do not force the door open or closed. Disconnect the opener using the emergency release cord and leave the door in the position it’s in. Then call for garage door opener repair—your opener may also need adjustment after the spring is replaced.
6. Rule Out Remote, Wall Button, and Power Issues
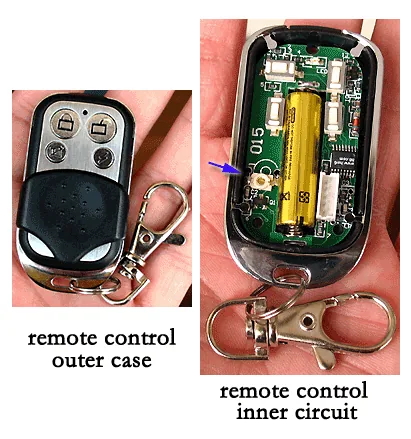
Sometimes the problem isn’t the door at all—it’s the control system. Start with the wall button. If the door closes from the wall button but not the remote, the remote is likely the issue. Replace the batteries first (CR2032 is common). If that doesn’t work, the remote may need reprogramming. Check the owner’s manual for the learn button procedure.
If the wall button doesn’t work either, check the opener’s power. Is the unit plugged in? Is the breaker tripped? Look for a blinking light on the opener—many models flash a diagnostic code. Count the flashes and check the manual. For example, 10 flashes often mean the sensors are misaligned.
In cold weather, battery performance drops. I’ve seen remotes fail at -20°C in the Interior. Keep a spare battery in the car. If the wall button is unresponsive, it may be a wiring issue. A short in the wall wire can cause the door to act erratically. This is a simple fix for a pro but can be tricky to diagnose. If you’ve ruled out everything else, call for garage door repair in Vancouver or your local area.
7. Check for Obstructions and Worn Rollers
Even if the photo eyes are clear, physical obstructions in the track can stop the door. Common culprits: bent track sections, rusted or broken rollers, debris like leaves or gravel, and ice buildup. In BC’s wet climate, tracks can rust and develop rough spots. In the Interior, ice can form inside the track if the door isn’t sealed well.
Inspect the rollers: they should spin freely. If a roller is flat-spotted or seized, it will cause the door to bind and reverse. Replace worn rollers with nylon or steel ones—nylon are quieter and don’t rust. A set of 10 rollers costs about $30–$60 from a hardware store. Installation is straightforward if you’re handy, but be careful—the door is heavy. If you’re not comfortable, hire a pro.
Also check the track alignment. Use a level to see if the vertical tracks are plumb. If a track is pushed out of alignment, the door will rub and reverse. Track adjustment is a common part of garage door repair Surrey services.
8. Know When to Call a Pro
Some problems are DIY-friendly; others are not. Call a professional if:
- The door reverses after you’ve aligned sensors and adjusted limits.
- You suspect a broken spring.
- The tracks are damaged or severely misaligned.
- The door is too heavy to lift manually.
- You see frayed cables or broken hardware.
- The opener makes unusual grinding or screeching noises.
A professional inspection costs around $100–$150 in BC, and most companies apply that to the repair. It’s cheap peace of mind. I’ve seen homeowners cause thousands in damage by trying to fix a spring or track themselves. Don’t be that person.
If you’re in the Lower Mainland, reach out for garage door repair in Vancouver or a nearby city. For Surrey residents, garage door repair Surrey companies have the local experience to handle everything from sensor alignment to spring replacement. Remember: a well-maintained door should last 20+ years with regular service.
Frequently Asked Questions
Why does my garage door start to close but then reverse before hitting the floor?
This is usually a travel limit issue. The down limit is set too high, so the opener thinks the door has reached the floor prematurely. Adjust the down limit in small increments until the door closes fully.
Can I replace a broken garage door spring myself?
Absolutely not. Torsion and extension springs are under extreme tension and can cause severe injury or death if mishandled. Always hire a licensed technician for spring replacement.
How often should I clean my safety sensors?
I recommend cleaning the sensor lenses with a soft cloth every 3–6 months, especially if you live in a dusty or humid area like coastal BC.
What does it mean if both sensor lights are off?
Both lights off usually means the sensors have no power. Check the opener’s power supply, the breaker, and the wiring connections. If power is fine, the sensors may be faulty and need replacement.
Need a Hand From a Real Technician?
Same-day garage door repair across Greater Vancouver — no call-out fee, written estimate before we start.
call Call 778-805-4911